Solar-powered with rechargable battery back-up for wire-free operation


Only Solar-Powered Security Cameras with Worldwide Cellular Coverage
Solar-powered with rechargable battery back-up for wire-free operation
3G/4G worldwide cellular connection
Thermal night vision captures images otherwise hidden to the human eye
Durable enough for any climate or worksite
Custom lens and mount options to suit your specific needs with easy installation
Industry-leading motion sensors send immediate alerts when triggered
24/7 Cloud-based portal allows monitoring from anywhere
Live view images available upon request via our software
Not a problem for the Predator. With wire-free connectivity and fully autonomous solar-powered operation, the Predator provides unmatched surveillance of your site.

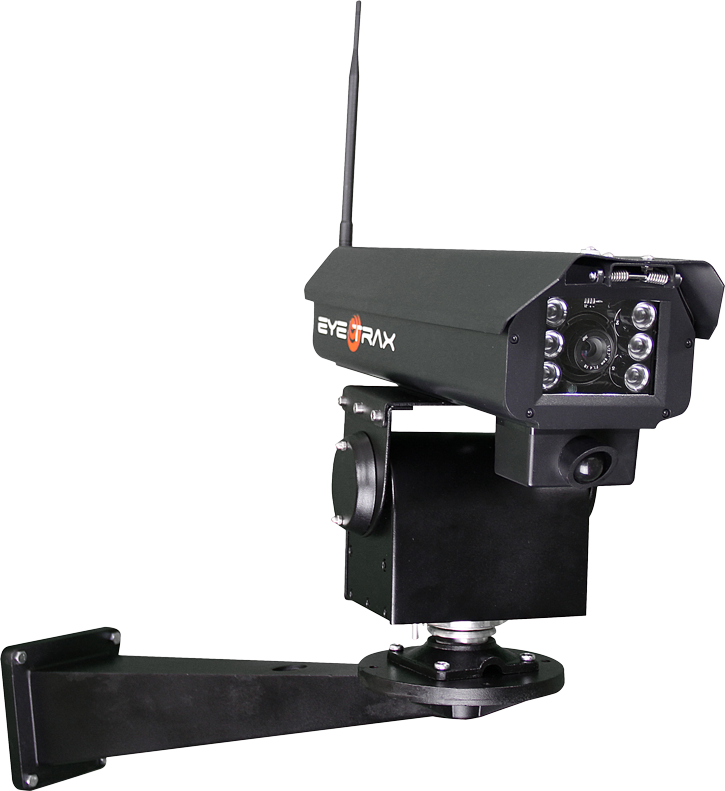
The Eye Trax Ranger series consists of two models: the original fixed-mount Ranger and the Ranger PTZ. Equipped with the same security features as the fixed-mount version, the Ranger PTZ (Pan-Tilt-Zoom) additionally allows you to remotely change the viewing direction or level of zoom of your camera system—delivering even greater control of the surveillance of your site.
Solar with 7-day internal battery back-up
Live image request
Scheduled image acquisition
Motion-activated video clips
3G/4G cellular
100 ft. (30 m) invisible infrared light
Instant text, email, and push notifications
Fixed or PTZ (Pan-Tilt-Zoom)
(L) 11 in. x (H) 5 in. x (W) 5 in.
28 cm x 13 cm x 13 cm
Primary Sensor 40 ft. (12 m)
Remote Sensor 140 ft. (43 m)
3.6 mm / 74° (wide-angle)
6.0 mm / 42° (general viewing)
12 mm / 22° (telescopic)
Video and image archive with 12 months storage
2 MP / 1920 x 1080
6 lbs. (2.7 kg)
-25 °F to 140 °F
-32 °C to 60 °C
Cloud services (software and storage)
Easy-to-use intuitive web-based command center
Built-in SD card with local back-up in the event of a connection interruption
Discover the freedom of reliable remote security with the Ranger security camera.
Primary power:
Solar (one 30-watt panel)
System operation voltage:
12V
Secondary power:
Lithium ion battery or 110 / 220 AC option
Battery Life:
7 days (continuous operation with no sun exposure)
Transmission:
3G/4G cellular
Image access:
Cloud services (software and storage)
Antenna/modem:
2G, 3G and 4G (GSM & CDMA)
Antenna:
Removable SMA 5db gain
Resolution:
2MP / 1920 x 1080
Lens options:
3.6 mm / 74° (wide-angle)
6.0 mm / 42° (general viewing)
12 mm / 22° (telescopic)
Capabilities:
Live image request
Scheduled image acquisition
motion-activated video clips
Motion sensor technology:
Thermal detection (PIR)
Motion detection distance:
Primary Sensor 40 ft. (12 m)
Remote Sensor 140 ft. (43 m)
Night vision technology:
Invisible infrared light
Night vision distance:
100 ft. (30 m)
Alarm input:
2V to 24V (external devices)
Alarm output:
12V (external devices)
Camera dimensions:
(L) 11 in. x (H) 5 in. x (W) 5 in.
28 cm x 13 cm x 13 cm
Camera weight:
6 lbs. (2.7 kg)
Solar panel dimensions:
(L) 22 in. x (H) 5 in. x (W) 1 in.
56 cm x 13 cm x 3 cm
Solar panel weight:
8 lbs. (3.6 kg)
Operation temperatures:
-25 °F to 140 °F
-32 °C to 60 °C
Camera casing:
Weather-proof aluminum
Create the optimal Eye Trax system with our custom Ranger accessories.
Since Eye Trax predetermines the best cellular provider for your cameras based on the location of your site, there’s no need to locate an internet connection for the Ranger when you receive your camera system. And with wire-free operation, the Eye Trax Ranger can be easily installed in four simple steps:
Flip the toggle switch to power on the Ranger
Install the camera and solar panel brackets on a pole or flat surface using the self-securing hardware provided with your camera
Point the Ranger in the direction of your desired security coverage area. Aim the camera’s solar panel to be facing south for the most sun exposure, adjusting the angle to 45°
Use your phone to verify that your camera is viewing the desired security coverage area. If not, make adjustments as necessary until you are satisfied with the viewing area
Download our full Ranger Installation Guide.
Before Eye Trax, when a site that needed security was beyond the reach of electrical outlets, the only solution was to lay new electrical cable to the desired location in a costly, time-consuming process known as trenching. Eye Trax gives you the freedom of completely wire-free connectivity with solar-powered cameras that run on the power of the sun—not electricity.
Before your cameras are shipped to you, Eye Trax determines the cellular provider with the best coverage for the planned location of your security cameras so that your system arrives ready to operate, automatically connecting to the nearest cellular tower. Our monthly cloud services plans include unlimited cellular data transfer and cloud-based software that can be accessed from any web browser or mobile device to connect you to your site camera’s whenever needed.
Each Ranger comes with a Remote Motion Sensor included that responds to changes in thermal activity within a 40-foot one-directional range (12 m). Additional sensors may be added to extend the motion detection area an additional 140 feet (43 m).
Unlike other security camera systems on the market that rely on a “change in pixels” to detect movement, Eye Trax employs the more advanced method of Passive Infrared Sensors (PIR) to create an invisible thermal grid that triggers only when new thermal profiles (human or vehicle) are introduced.
Eye Trax cameras employ sophisticated motion sensors that trigger a response to disturbances within half a second. You will immediately receive a text alert image or short video clip of the disturbance, or if your cameras are being monitored by a security command center, our cloud software will highlight the camera view in red. Since some sites may have legitimate activity during certain hours, we offer Scheduled Alerting to activate alerts only when you need them. You may also view live images or video from your site at any time via our cloud-based software.
For more information about image retrieval and alerts, click here
| Ranger | Mega | Predator | |
|---|---|---|---|
| Solar Powered | |||
| Still Images | |||
| Video (10 seconds or more) |
|||
| Cellular Capability | |||
| Motion Sensors | |||
| Night Vision | |||
| Resolution | 2MP / 1920 x 1080 | 12MP / 4000 x 3000 | 5MP / 2592 x 1944 |
| Lens Options | 74°, 42°, 22° | 90°, 45° | 74°, 42°, 22° |
| Mount Options | Fixed, Pan-Tilt-Zoom (PTZ) | Fixed, Pan-Tilt-Zoom (PTZ) | Fixed, Pan-Tilt-Zoom (PTZ) |
| Time-Lapse Capability | |||
| Optimal Uses | Remote Security | High-Definition Time-Lapse | Ultimate Security |
| Ranger | |
|---|---|
| Solar Powered | |
| Still Images | |
| Video (10 seconds or more) | |
| Cellular Capability | |
| Motion Sensors | |
| Night Vision | |
| Resolution | 2MP / 1920 x 1080 |
| Lens Options | 74°, 42°, 22° |
| Mount Options | Fixed, Pan-Tilt-Zoom (PTZ) |
| Time-Lapse Capability | |
| Optimal Uses | Remote Security |
| Mega | |
|---|---|
| Solar Powered | |
| Still Images | |
| Video (10 seconds or more) | |
| Cellular Capability | |
| Motion Sensors | |
| Night Vision | |
| Resolution | 12MP / 4000 x 3000 |
| Lens Options | 90°, 45° |
| Mount Options | Fixed, Pan-Tilt-Zoom (PTZ) |
| Time-Lapse Capability | |
| Optimal Uses | High-Definition Time-Lapse |
| Predator | |
|---|---|
| Solar Powered | |
| Still Images | |
| Video (10 seconds or more) | |
| Cellular Capability | |
| Motion Sensors | |
| Night Vision | |
| Resolution | 5MP / 2592 x 1944 |
| Lens Options | 74°, 42°, 22° |
| Mount Options | Fixed, Pan-Tilt-Zoom (PTZ) |
| Time-Lapse Capability | |
| Optimal Uses | Ultimate Security |
| Accessories | msrp |
|---|---|
| 1-way remote wireless sensor | $195 |
| 4-way remote wireless sensor | $225 |
| Storage case | $375 |
| Storage case (PTZ) |
$425 |
| Barrel mounting pole | $425 |
| Modular pole system | $295 |
| Universal pole mount | $85 |
| Solar panel extension wire | $125 |
| Directional antenna | $235 |
| Camera Model | Monthly | Annually |
|---|---|---|
| Ranger | $80 | $864 |
| Ranger (PTZ) | $80 | $864 |
| Mega | $125 | $1,350 |
| Mega (PTZ) | $125 | $1,350 |
| Predator | $125 | $1,350 |
| Predator (PTZ) | $125 | $1,350 |